Most living rooms are not ugly. They are unfinished. Flat walls, one lonely overhead light, a rug the size of a doormat, and nothing worth a second look. The gap between that and a room that stops people in the doorway is not a bigger budget or a designer on retainer. It is a few bold decisions made in the right order.
Here is the exact playbook we use inside Framehouse to take a plain rental living room to something that looks pulled from a design magazine. Upload one photo of the room you have, then make these moves one layer at a time. We ran a very ordinary New York apartment through every step, so you can watch it go from forgettable to unforgettable.
Step 01
Start With the Room You Actually Have
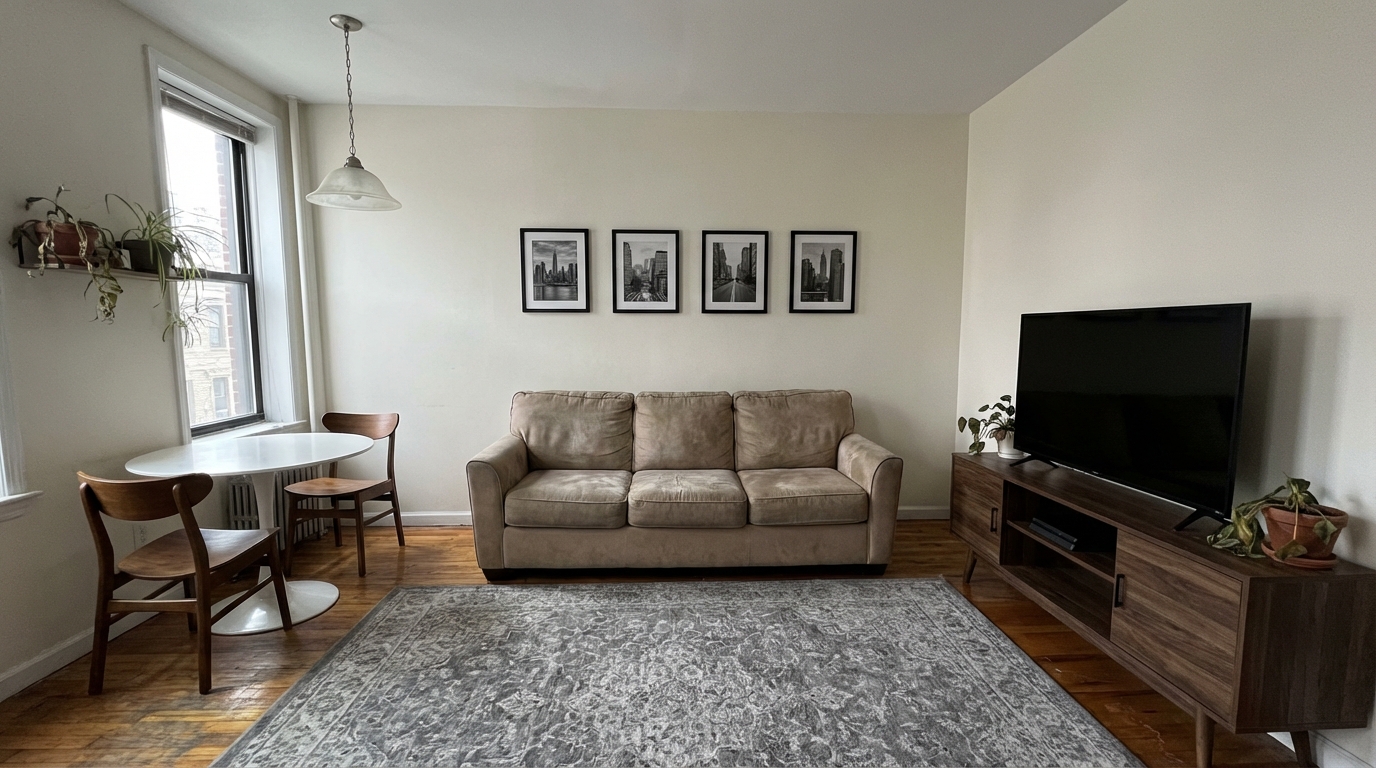
The before: a perfectly ordinary rental living room, flat and undecided.
Great rooms are not designed on a mood board. They are designed in the actual space, with its real light, its real windows, and its real awkward corners. So skip the inspiration spiral and start where a designer starts, which is a clear photo of your room exactly as it is today.
Then be honest about why it falls flat. Our New York living room is a textbook case: cool beige walls that kill the light, a heavy taupe sofa, one flat ceiling fixture, safe art, and a rug too small to matter. Nothing is broken. Everything is undecided. That is good news, because it means every move from here is an upgrade.
Tip
Shoot straight on from the doorway in daylight so the tool sees the whole room: walls, floor and ceiling.
Step 02
Set the Direction: Pick a Vibe, Then Steer It
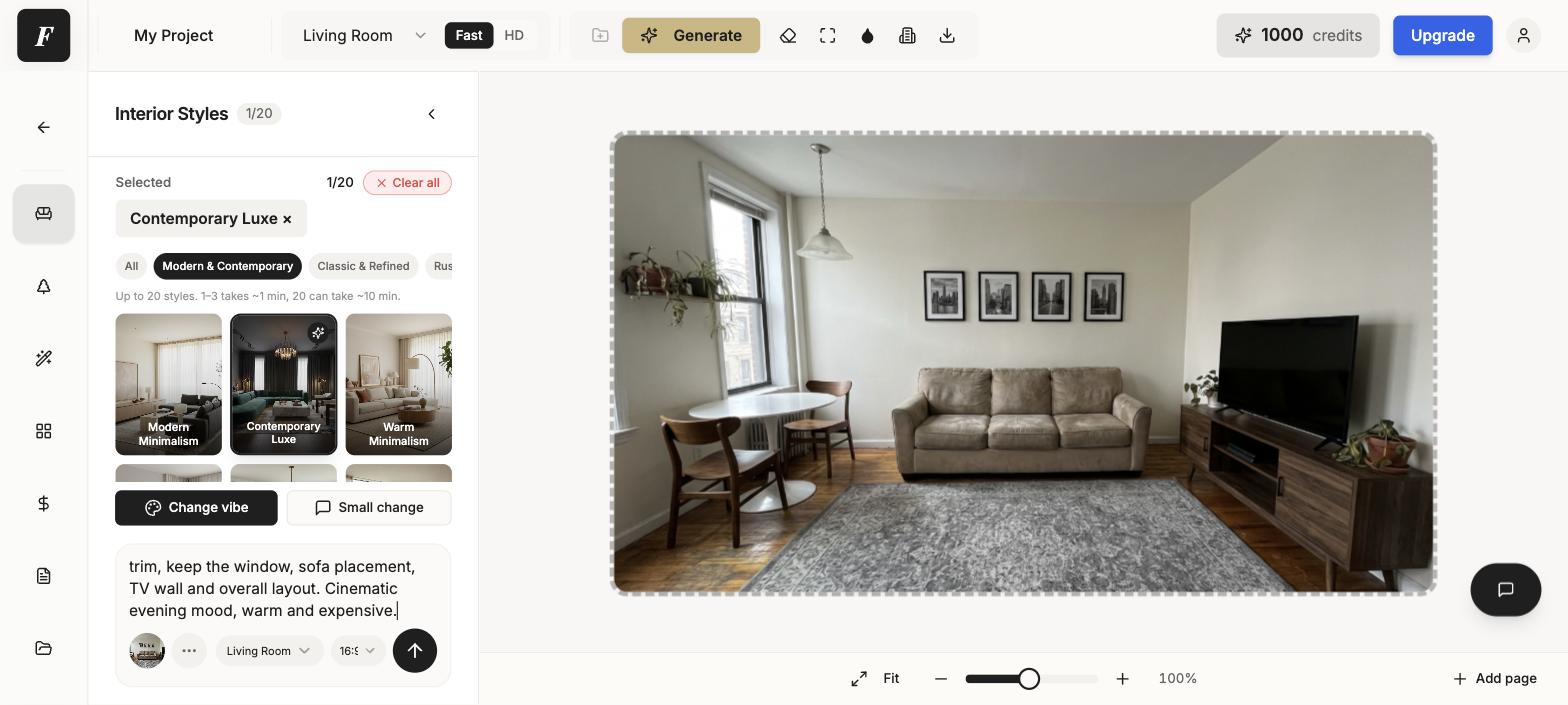
Pick a vibe for the mood, then use the instruction box to steer the specifics.
Framehouse gives you a shelf of interior vibes, from Modern Minimalism to Contemporary Luxe. Pick the one that matches the mood you are chasing, not just the prettiest thumbnail. We wanted something moody and expensive, so we chose Contemporary Luxe.
The vibe sets the overall direction. The instruction box is where you steer the specifics. Type what you actually want, set the output ratio to match your photo so nothing gets cropped, and you are ready to build. Everything after this is one deliberate layer at a time.
Tip
Match the output ratio to your photo. A wide shot is 16:9, a tall phone photo is 3:4.
Step 03
Commit to a Color Story
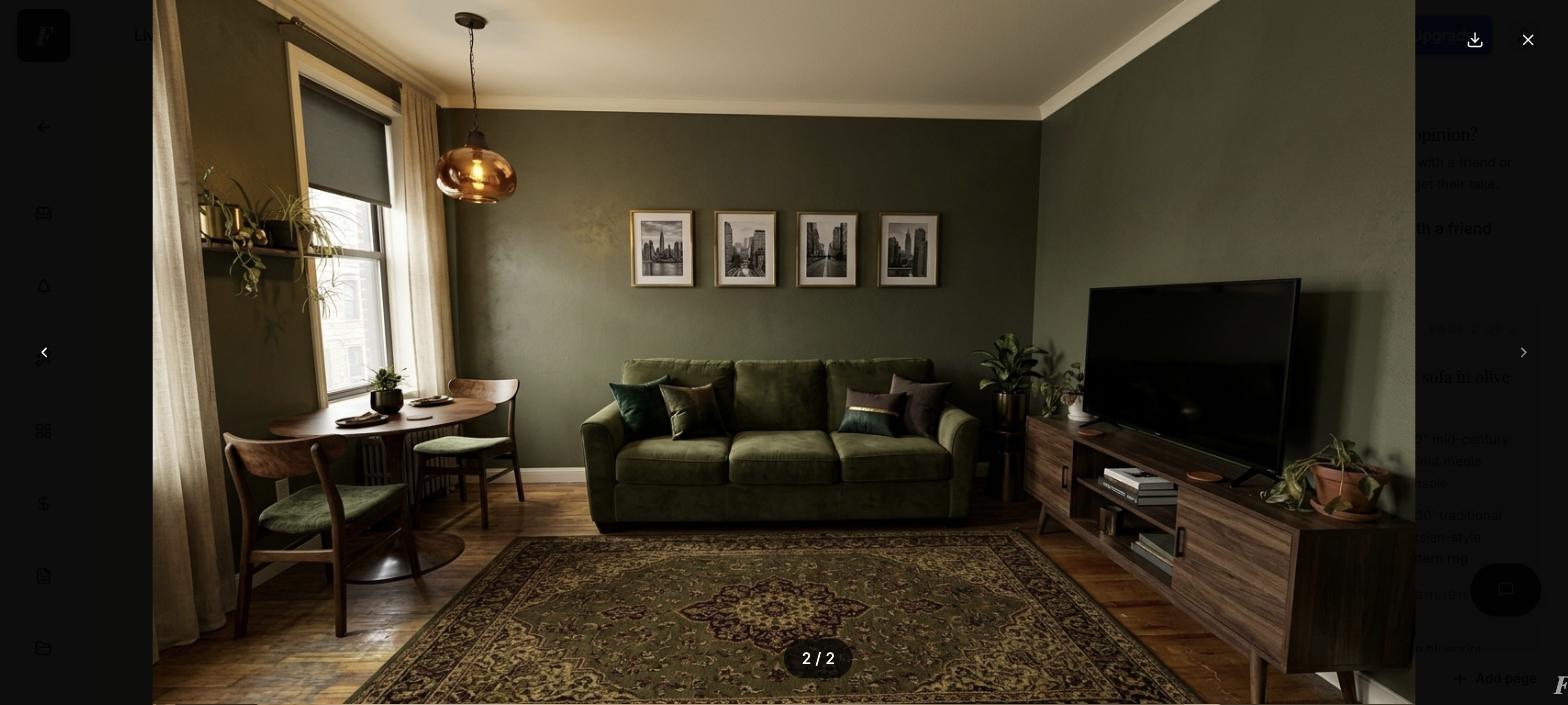
One move: deep olive plaster walls turn the bland box into a moody, luxe room.
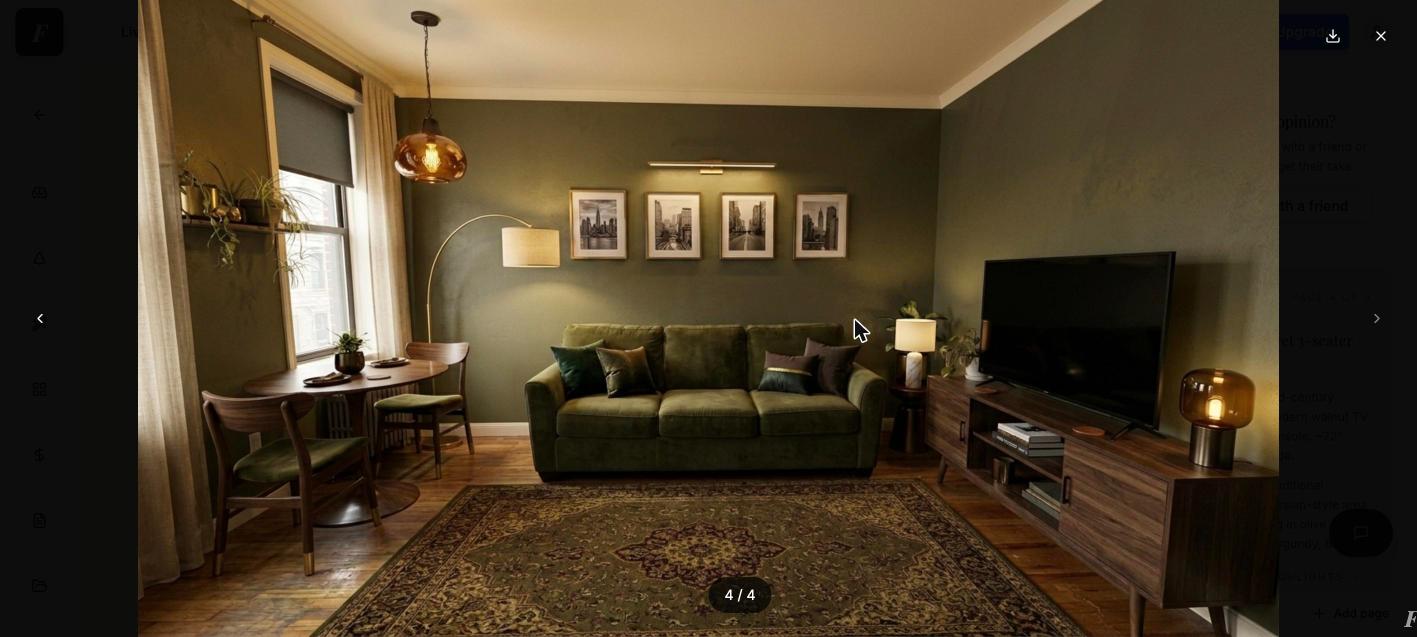
The single most dramatic thing you can do to a room is change its envelope, which means the walls. Most spaces hide behind safe off-white and stay forgettable forever. Wrap the whole room in one saturated color instead, and it reads expensive before you have moved a single piece of furniture.
We asked for deep matte olive-green plaster walls. One generation later the bland beige box was gone, replaced by a moody, sophisticated room with a velvet sofa that finally had a backdrop worthy of it. That is the power of committing to a color.
Tip
Cold or builder-beige rooms want a warm, saturated color. Pick one confident shade and commit.
Step 04
Light It in Layers
An arc floor lamp, a table lamp and a picture light replace the flat overhead glow.
A single overhead fixture flattens everything under it. Designed rooms glow from three or four sources at different heights: an arc floor lamp reaching over the sofa, a warm table lamp on the console, a slim picture light above the art. Pools of warm light and soft shadow are exactly what make a space feel like evening at a very good hotel.
In Framehouse, use Make a Small Change and ask for that layered lighting while keeping everything else. The room went from simply lit to genuinely lush, without touching a single wall or piece of furniture.
Tip
If a room ever feels lifeless, add a lamp before you add anything else. Layered light is the cheapest luxury there is.
Step 05
Right-Size the Rug
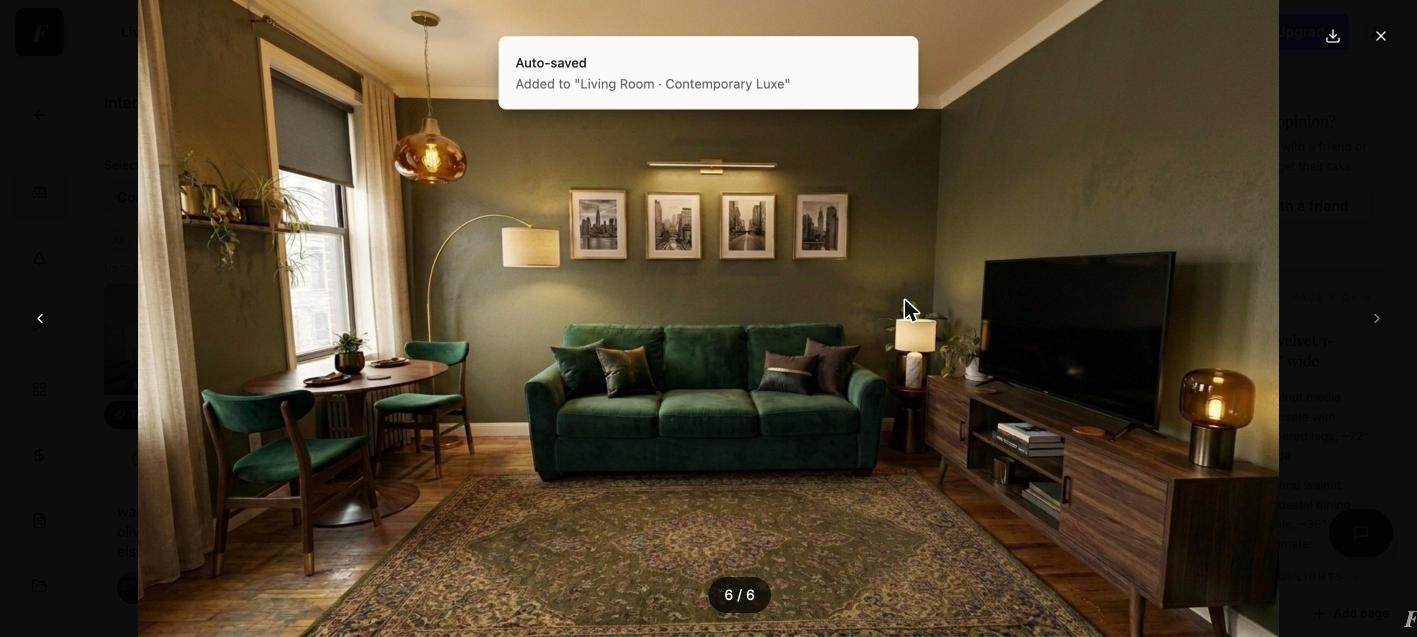
A properly scaled rug slides under the furniture and anchors the whole seating zone.
The most common mistake in any living room is a rug that is too small, a little island marooned in the middle of the floor. The fix is proportion. A properly scaled rug reaches under the front legs of the sofa and defines the entire seating area. Counterintuitively, a bigger rug makes the whole room feel bigger.
One small change swaps the postage stamp for a rug that anchors the furniture. Suddenly the seating area looks composed and intentional instead of accidental.
Tip
When in doubt, size up. The rug should tie the furniture together, not float apart from it.
Step 06
Add Height, Layers, and One Focal Point
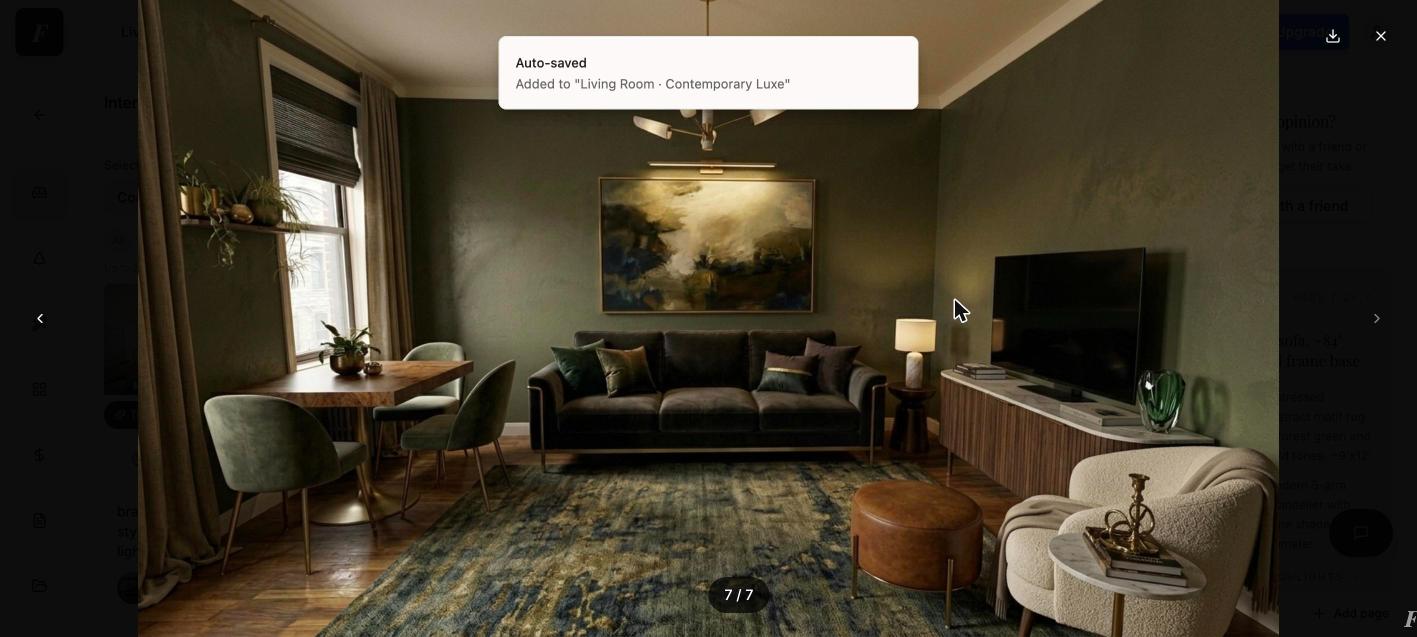
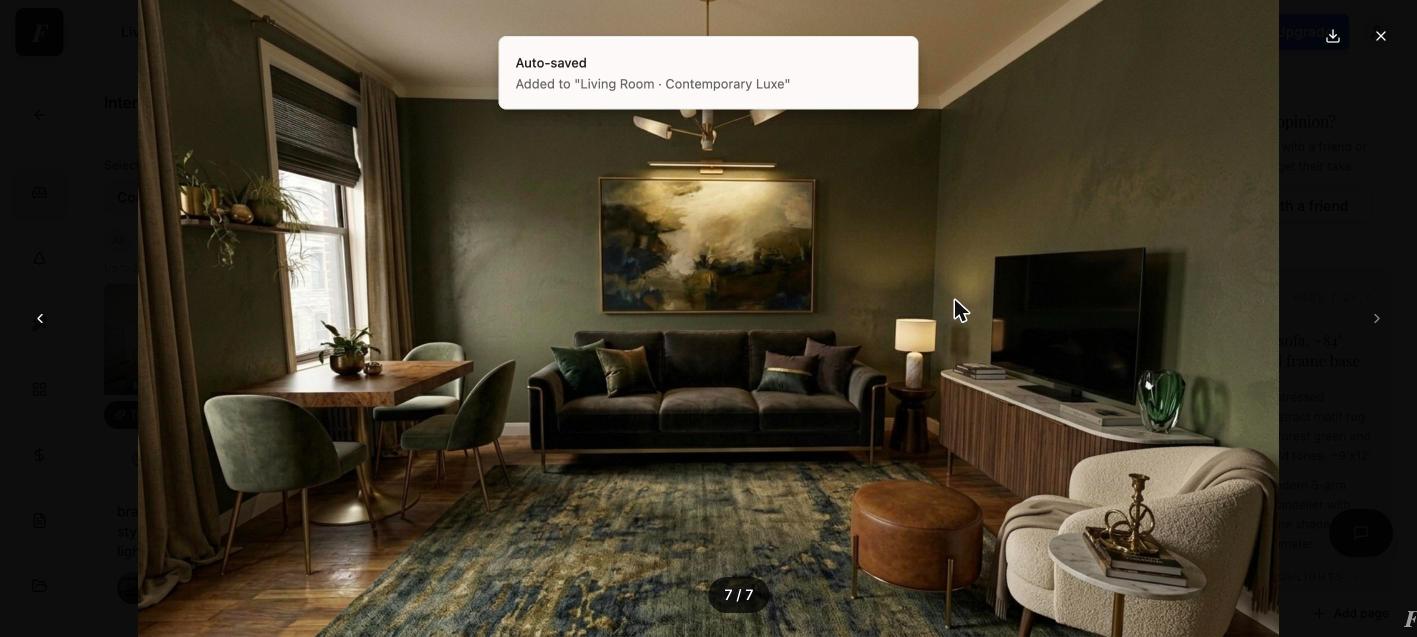
Floor to ceiling drapery, layered materials and one large statement painting finish the room.
This is the move that tips a nice room into a magazine room, and it is really three habits at once.
First, height. Hang floor to ceiling drapery mounted high above the window and pooling at the floor. The eye reads the full drop as ceiling height, and a standard room suddenly feels grand.
Second, layers. Mix materials so the eye keeps traveling: a boucle accent chair, an aged cognac leather ottoman, marble and brass, sculptural greenery, a stack of styled books.
Third, a focal point. Give the room one hero that everything orbits. We swapped the timid grid of prints for a single large abstract painting above the sofa. Ask Framehouse for all of it in one instruction, and the plain rental finishes as something you would happily photograph.
Tip
One large piece of art beats a scattering of small frames every time. Give the eye somewhere to land.
Step 07
Take the Plan, Not Just the Pretty Picture
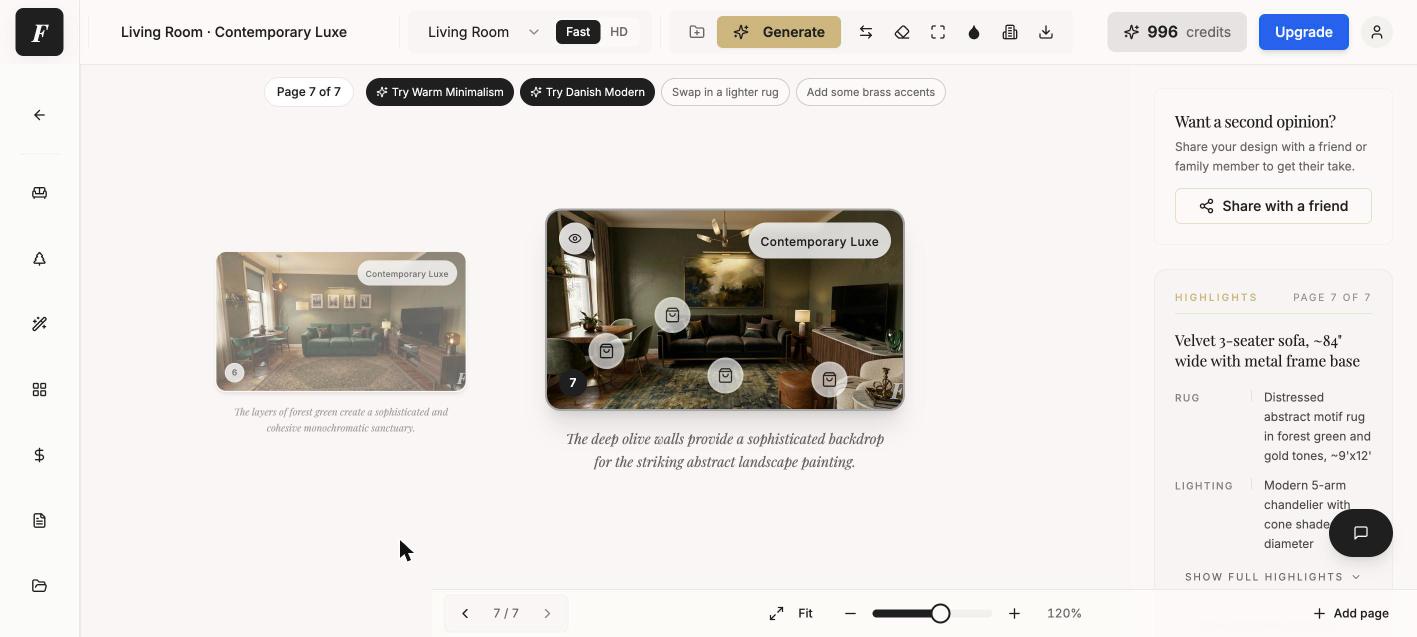
Every render comes with a Highlights panel that names each piece and its size.
Here is the part that turns a fun experiment into a room you can actually build. Most design apps hand you a prettier picture and wish you luck. Framehouse hands you the plan. Alongside every render, the Highlights panel names the pieces and their real sizes: an 84 inch velvet sofa, a 9 by 12 patterned rug, a walnut media console, the chandelier. That is not a daydream. That is a shopping list.
So that is the whole playbook. Start with your real room, commit to a color, layer the light, size the rug, add height and materials, and crown it with one focal point. Luxury design, without the designer price or the designer timeline. Start free at framehouse.design and reimagine your living room.
Tip
Screenshot the Highlights panel before you shop. It is your sourcing list, dimensions included.
Quick answers
Common questions
Ready to try it yourself?
Upload a photo of your space, pick a direction, and see it transformed in seconds.